Can LED neon lights be used in freezing outdoor temperatures? In many cases, yes, but the answer depends on the product, installation, and local weather conditions. A sign that performs well at 20°C may behave differently at -20°C, especially during repeated freezing and thawing.
Lighting engineer James Benya offers a useful principle: “A good lighting system begins with understanding the environment.” That idea matters here. Outdoor LED neon should have a documented operating temperature range, suitable weather protection, and a sealed silicone body. Look for products rated IP65 or higher, while checking what that rating actually covers. The LED strip, transformer, connectors, and controller must all tolerate cold exposure. One weak connector can allow moisture inside.
Cold temperatures may make silicone, acrylic, and cable jackets less flexible. Bending them during installation can create tiny cracks. I would not trust a bright indoor test alone. Test the complete system outdoors, after dark, during a cold cycle. Watch for flickering, delayed startup, dim sections, condensation, or unusual transformer noise.
Power supplies also deserve attention. Their rated output may change in low temperatures, and voltage drop can become more noticeable across long runs. Installers should follow the manufacturer’s spacing, mounting, and ventilation requirements. Do not seal heat-producing components inside an unsuitable box.
The practical conclusion is cautious, not dramatic. Freezing weather does not automatically disqualify LED neon. However, “weatherproof” is not a universal promise. Check the specifications, protect every connection, and accept that real winter conditions may reveal weaknesses that laboratory ratings miss.
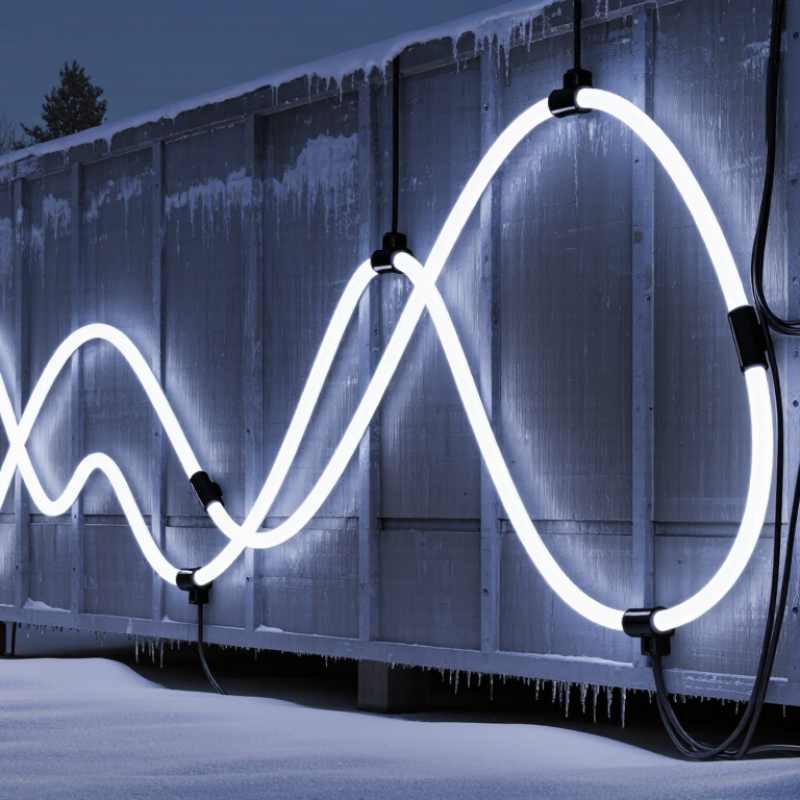
LED neon lights can perform well in freezing outdoor temperatures, but cold changes how every component behaves. The light itself usually remains stable when the temperature stays within its rated range. The power supply needs closer attention. Its output may become less reliable during startup, especially below 0°C.
In outdoor testing, flexible neon tubing often feels stiffer on cold mornings. Bending it sharply can damage the internal LED strip or create uneven brightness. Installers should warm the tubing indoors before shaping it. Leave gentle curves, not tight corners. Small details matter.
Moisture is another serious concern. Melting frost can enter weak joints and freeze again overnight. Use sealed connectors, outdoor-rated cable, and a power supply with suitable protection. Check the product’s temperature and ingress ratings, rather than trusting general advertising. A drain path can also prevent water from collecting behind the lighting.
Cold weather exposes installation mistakes. A cable that works in autumn may become rigid and crack in winter. Allow extra cable length for contraction, and protect connections from direct snow. I have seen condensation cause more failures than low temperature itself. Still, ratings are not promises for every climate. Wind, ice, sunlight, and repeated freeze-thaw cycles can shorten service life. Test a small section through one cold spell before committing to a large installation.
| Outdoor Temperature | Typical Performance | Silicone Flexibility | Brightness and Power Behavior | Main Outdoor Considerations | Recommended Practice |
|---|---|---|---|---|---|
| Above 0°C (Above 32°F) |
Excellent Normal operation is generally expected when the product is correctly installed. |
Silicone remains flexible and is easier to bend around curves and corners. | LED output and electrical consumption should remain close to the product's rated values. | Rain, ultraviolet exposure, drainage, and cable protection are usually more important than cold resistance. | Use an outdoor-rated product, seal cable entries, and provide a suitable power supply with adequate ventilation. |
| 0°C to −10°C (32°F to 14°F) |
Very Good Most outdoor LED neon systems continue to operate normally. |
The silicone jacket may feel slightly firmer, but careful installation is usually practical. | LED efficiency can remain stable or improve slightly as semiconductor temperature decreases, although the exact result depends on the design. | Moisture can freeze inside poorly sealed joints, creating mechanical stress during expansion and contraction. | Install when the material is warm if possible, avoid sharp bends, and keep connectors above areas where water can collect. |
| −10°C to −20°C (14°F to −4°F) |
Good with Care Operation is commonly possible, but installation quality becomes more critical. |
The silicone becomes noticeably stiffer. Bending or twisting it aggressively can damage the jacket or internal components. | Brightness normally remains consistent after startup, while the power supply may require additional cold-temperature verification. | Thermal contraction can stress mounting clips, end caps, solder joints, and cable connections. | Pre-form the neon indoors, use flexible outdoor-rated cables, allow expansion space, and follow the specified minimum operating temperature. |
| −20°C to −30°C (−4°F to −22°F) |
Use Verified Equipment Performance depends strongly on the LED neon construction, driver, and installation method. |
The jacket can become quite rigid. Forced bending may produce permanent deformation or internal stress. | LEDs may operate efficiently once powered, but the power supply, dimmer, and controller may have different low-temperature limits. | Ice, snow, condensation, and repeated temperature cycling increase the risk of water ingress and connection failure. | Confirm the complete system's operating range, not only the neon tube rating. Use sealed connections and avoid installation during extreme cold. |
| −30°C to −40°C (−22°F to −40°F) |
Specialist Application Use only equipment explicitly rated for this range. |
Silicone and adhesives may be significantly less flexible, so bending on site should be avoided. | Cold-start behavior and driver performance must be confirmed through the product's technical documentation or testing. | Freeze-thaw cycles, brittle accessories, trapped moisture, and cable insulation limits become major reliability concerns. | Use pre-assembled sections, cold-rated drivers and wiring, mechanically supported mounting, and a controlled installation procedure. |
| Below −40°C (Below −40°F) |
Do Not Assume Compatibility Standard outdoor LED neon should not be assumed suitable. |
Material behavior, seals, adhesives, and mounting parts require dedicated low-temperature validation. | Startup, dimming, and power conversion performance may fall outside normal specifications. | Conventional ratings may not cover continuous exposure, rapid cycling, or severe wind and ice loading. | Use a system specifically engineered and tested for the site conditions, including the power supply, controls, wiring, and mounting hardware. |
Important: Temperature limits vary by construction and product specification. Before installation, verify the complete system's operating and storage temperatures, ingress-protection requirements, power-supply limits, cable rating, bending radius, and installation instructions. “Outdoor-rated” does not automatically mean “rated for freezing temperatures.”
Choose tubing rated below your local winter minimum. Check the cold-bend limit, not only the outdoor label. A bright sample proves little.
Cold silicone becomes stiff and less forgiving. Forcing a tight curve can crack the outer jacket. Warm the material indoors before shaping it.
Use a constant-voltage supply rated for low temperatures. Allow about 20 percent spare capacity. Install it in a ventilated, weather-protected enclosure.
Use weather-resistant connectors and heat-shrink seals at every joint. Face cable entries downward to limit water movement. Add drip loops where practical.
Not always. A sealed box may trap condensation inside. Choose protection from rain while allowing suitable ventilation.
Leave extra cable length for contraction. Secure the cable without crushing the neon tube. Tight runs may pull against terminals during freezing and thawing.
Turn off power before touching the system. Check cracks, cloudy sections, loose clips, and moisture near connectors. Inspect hidden joints monthly, especially near low mounting points.
Heavy snow should not remain on the light. Remove it gently with a soft brush. Avoid shovels and hard scrapers.
Test a small outdoor section before a permanent installation. Watch for flicker, cable stiffness, contraction, and moisture. I once underestimated a low connector. Corrosion had already begun.
Request the minimum temperature, bend radius, sealing method, and ingress rating. Check UV resistance and cable flexibility too. If key details are missing, pause the purchase.
Can LED neon lights be used in freezing outdoor temperatures? Yes, but their performance depends on choosing cold-resistant materials, sealed construction, and components rated for the expected winter conditions. Before installation, inspect the mounting surface, remove moisture, snow, ice, and debris, and provide proper drainage to reduce water accumulation. Flexible LED neon products should remain within their recommended bending and operating limits, since extreme cold can make some coverings or adhesives less flexible.
Safe installation also requires weatherproof connectors, protected power supplies, secure cable routing, and suitable electrical protection. Avoid handling or bending the lighting when it is frozen, and allow it to warm gradually if necessary. During winter, regularly check for cracked coverings, loose sections, damaged cables, water entry, snow buildup, and abnormal flickering. Cleaning the lights carefully and removing heavy ice or snow can help maintain brightness and extend service life. With appropriate product selection, preparation, installation, and maintenance, LED neon lights can provide reliable outdoor illumination throughout freezing weather.

 Zionsville Lighting